Followers / Seguidores

Showing posts with label shawl. Show all posts

Monday, July 29, 2013

Skull Square Motif


(What's that creepy-looking skeletal shadow?!)

July 29, 2013:

Hi everyone and welcome!

I saw the most interesting shawl pattern on the internet recently.   I came across this pretty pattern which reminds me of the spider web design but instead of the chain lengths extending to a diamond-shaped grouping of single crochet stitches in the middle, there are the chain lengths extending on either side to a little skull.    Interesting!

The Skull Shawl pattern is one by Majkis at her blog at:
Virkad döskallesjal. Med mönster // Crochet skull shawl. With pattern.

She notes on her blog that this is the first time that she has written a pattern in English.  Her blog is a Swedish blog.  The English translations for each step are below the photographs on her blog.  It's a little hard to follow and it's only written for the shawl as a whole; not directions for individual "stand-alone" motifs.  The "stand-alone" motifs are what I wanted to do instead.

Also, the Skull Shawl blog post notes that the skull part is made two different ways:
Method #1.  The eyes are made as a separate piece and then crocheted onto the bottom of the skull above the teeth.
Method #2.  The eyes are made WITHOUT making them as a separate piece.  Row 9 is the most complicated as there are more turns in this row and this is how the eyes are worked.

*I prefer to make the skull as method #2 and not making the eyes as a separate piece.  Benefit to this is that there aren't the extra ends to sew in later.

So, I started to crochet, rip and write, crochet, rip and write.....many times!  I finally came up with the motif.  I figured out how to do the decreasing for the upper part of the motif when it shapes back into a point (remember, this is a diamond shaped motif).

I still want to work up this shawl pattern soon as a shawl.  I think it will be a great "conversation piece" garment.

I, with my crochet symbol sketching skills not up to par, decided to write it out instead.  But I do have this pattern written out as clearly as I can make it and taking beginners into account.

Abbreviations (American terminology):
sp:  space
ch(s):  chain(s)
sl st:  slip stitch
hdc:  half double crochet
dc:  double crochet
dtr:  double triple/treble crochet (3 yarn overs)
5-YO stitch:  yarn over 5 times keeping yarn fairly tight.  Just think of this as a really tall stitch!


Here is the way I make this motif!


Chain 11.

Row 1.  Skip 1st 7 chains, 1 dc in each of the next 4 chs.  Ch 2, dtr in the same ch as the last dc just made.  Turn.

Row 2.  Ch 7, 4 dc in 1st ch space, ch 2, 4 dc in last ch space, ch 2, dtr in same sp as the last 4 dc just made.  Turn.

Row 3.  Ch 7, 4 dc in 1st ch space, ch 2, 4 dc in next ch space, ch 2, 4 dc in last ch space.  Ch 2, dtr in same sp as the last 4 dc just made.  Turn.

Row 4.  Ch 7, 4 dc in 1st ch space, (ch 2, 4 dc in next ch space) 3 times more.  Ch 2, dtr in same sp as the last 4 dc just made.  Turn.

Row 5.  Ch 7, 4 dc in 1st ch space, ch 2, 4 dc in next ch space, ch 9, skip next ch space, 4 dc in next ch space, ch 2, 4 dc in last ch space, ch 2, dtr in same sp as the last 4 dc just made.  Turn.

Row 6.  (pictured)  Ch 7, 4 dc in 1st ch space, ch 2, 4 dc in next ch space, ch 7, 4 sc in ch-9 space, ch 7, 4 dc in next ch space, ch 2, 4 dc in next ch space.  Ch 2, dtr in same space as the last 4 dc just made.  Turn.


Row 7.  Ch 7, 4 dc in 1st ch space, ch 2, 4 dc in next ch space, ch 7, (dc in next sc, ch 1) 3 times, dc in next sc, ch 7, 4 dc in next ch-2 space, ch 2, 4 dc in next ch space.  Ch 2, dtr in same sp as the last 4 dc just made.  Turn.

Row 8.  (pictured on wrong side)  Ch 7, 4 dc in 1st ch space, ch 2, 4 dc in next ch space,  ch 7, skip 4 chs of the next ch-6 space, 1 sc in 5th ch, 1 sc in 6th ch, (sc in next dc, sc in next ch-1 sp) 3 times, sc in next dc, 1 sc in each of the next 2 chs of the next ch-6 space, ch 7, 4 dc in next ch-2 space, ch 2, 4 dc in next ch space.  Ch 2, dtr in same space as the last 4 dc just made.  Turn.


Row 9.  Ch 7, 4 dc in 1st space, ch 2, 4 dc in next ch space.
Ch 8, 1 sc in each of 1st 4 sc, ch 5, skip next 3 sc, 1 sc in each of the next 4 sc, turn.
Ch 6, sc in center of ch-5 space, ch 6, skip 3 sc, sl st in next sc, turn.
10 Sc in 1st ch-6 space, 10 sc in next ch-6 space, sl st in end sc of previous row.
Ch 7, 4 dc in next ch-2 space, ch 2, 4 dc in last space.
Ch 2, dtr in same space as the last 4 dc just made.  Turn.

Row 10.  Ch 7, 4 dc in 1st ch space, ch 2, 4 dc in next ch space, ch 7, skip 1st 2 sc, sl st across next 16 sc, ch 7, 4 dc in next ch-2 space, ch 2, 4 dc in last sp.
Make one 5-YO stitch in same space as the last 4 dc just made.  Turn.

*Now you will be decreasing the sides on the upper half of this motif.

Row 11.  Ch 5, 4 dc in 1st ch space, ch 2, 4 dc in next ch space, ch 7, skip 1st 2 slip stitches, sc in next 12 slip stitches, ch 7, 4 dc in next space (towards end of row), ch 2, 4 dc in next ch-2 space, dtr in turning ch-8 space of previous row.  Turn.

Row 12.  Ch 5, 4 dc in 1st ch space, ch 2, 4 dc in next ch space, ch 7, skip 1st 2 sc, 1 sc in each of the next 8 sc, ch 7, 4 dc in next ch space, ch 2, 4 dc in next ch space, dtr in last space.  Turn.

Row 13.  Ch 5, 4 d in 1st ch space, ch 2, 4 dc in next ch space, ch 7, skip 1 sc, 1 sc in each of the next 6 sc, ch 7, 4 dc in next ch space, ch 2, 4 dc in next ch space, dtr in last ch space.  Turn.

Row 14.  Ch 5, 4 dc in 1st ch space, ch 2, 4 dc in next ch space, ch 7, skip 1 sc, 1 sc in each of the next 4 sc, ch 7, 4 dc in next ch space, ch 2, 4 dc in next ch space, dtr in last space.  Turn.

Row 15.  Ch 5, 4 dc in 1st ch space, ch 2, 4 dc in next ch space, ch 6, 4 dc in next ch space, ch 2, 4 dc in next ch space, dtr in next ch space.  Turn.

Row 16.  ch 5, 4 dc in 1st ch space, ch 2, 4 dc in next ch space, ch 2, 4 dc in same ch space, ch 2, 4 dc in next ch space, dtr in last ch space.  Turn.

Row 17.  Ch 5, 4 dc in 1st ch space, ch 2, 4 dc in next ch space, ch 2, 4 dc in next ch space, dtr in last ch space.  Turn.

Row 18.  Ch 5, 4 dc in 1st ch space, ch 2, 4 dc in next ch space, dtr in last ch space.  Turn.

Row 19.  Ch 5, 4 dc in next ch space, ch 5, sl st in 1st ch of next ch space.


EDGING:

*the edging stabilizes this motif and gives it a better shape.
**Working a 2nd round of stitches stabilizes the shape of the motif even better!
***I prefer 2 rounds of edging for shaping.


Round 1.  Without turning work, crochet 4 sc in each space around the perimeter and work 1 sc in each of the 4 stitches at the top and bottom of the motif.


Round 2.  Work 1 hdc in each sc stitch around, working an extra 2 hdc stitches at each corner.

Fasten off and sew in ends well with a large-eyed sewing needle.  Lightly press if necessary.


Two motifs finished.  I have the one of the left with an edging of single crochet stitches.  I noticed that by working sc (single crochet stitches) around the perimeter, this tends to stabilize the motif and makes it look more even.  If you put a round of hdc (half double crochet stitches) in the sc stitches, it looks more even and seems to stabilize the shape even better.  I have not tried a 3rd round of stitches around the perimeter.


These motifs all have 2 rounds of edging.  The first round is 4 sc stitches in each space around and the next round are 1 hdc in each sc around, making 2 extra hdc stitches in each corner to make the motif lay flat.
------------------------

This next section is the motif worked up with the eyes made separately.  I have included several photos which I took as I was making the skull part with this method.

I prefer to make the motif in one piece to avoid sewing in extra ends but that is something that is a personal preference.

Majkis explains on her blog how to make the eyes separately and attach them.  Just click the above link towards the top of this blog post page.


That's it!!!

Have fun if you decide to try to make this little Skull Motif!  It is rather fun!

Heck, I just thought of something......wear this as an accessory to to a witch's costume!!!   AWESOME!!!!    :)  :)

Happy crocheting!    ~Lee Ann Hamm    crochetgottaloveit.blogspot.com

Thank you for visiting my blog and I hope you enjoyed it.
Please leave me a comment; I always enjoy hearing from everyone!!

Saturday, January 26, 2013

January 26, 2013: Beautiful Shawl made by Monica from an Elizabeth Hiddleson Tablecloth Pattern!

http://www.ravelry.com/projects/MonicaFoster/drum-tablecloth

I just saw this amazing shawl for the first time today and I am stunned!  I love this!!


The above link will take you to the details on how Monica created this crochet garment on her Ravelry.com page.

It is made from a vintage or antique Elizabeth Hiddleson tablecloth pattern and adapted by Monica to make this beautiful shawl.

Sunday, November 13, 2011

Midsummer Night Crochet Shawl

Wow!  I saw this "beauty" of a shawl on cello-ma's website but it's all in Chinese.  I usually have to run her patterns through a translator.
Here is a link back to the original post on cello-ma's blog.  I love this shawl!
http://cello-ma.blog.163.com/blog/static/734615592011101853446443/


Friday, November 11, 2011

Circular Shawl Crochet Pattern

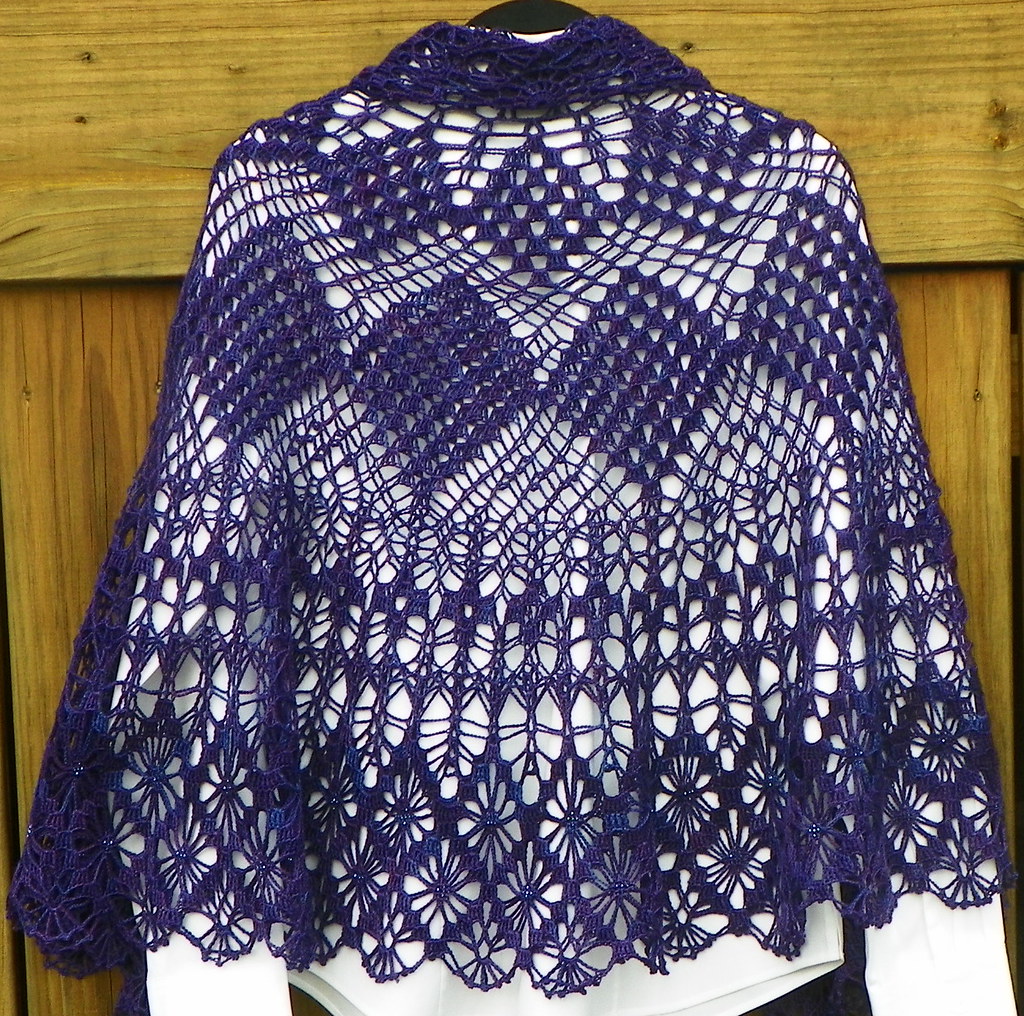
Wow!  Look at this beautiful circular shawl.  I've never made a circular one and it's been over 25 years since I've made any type of shawl, but this one gets the creative juices flowing!


The Size:
42’ diameter
The Gauge: Rounds 1-3 in dc=4 inch diameter (really, gauge is not critical)
The Materials:
  • Lion brand Pound of Love 1020yds/932.7m or any medium worsted weight yarn
  • Crochet hook: H/8/5.0mm
  • 1 tapestry needle
The Stitches:
Chain (ch)
Slip stitch (sl st)
Single crochet (sc)
Double crochet (dc)
V stitch (v st)
Double V stitch (dv st)
Shell stitch (5 or6 sh)
Camelot: from New Directions in Crochet by Anne Rabun Ough, the Viking Press-New York, 1981. Page 143.
The Instructions:
Round 1:
  • Chain (ch) 3.
  • Make a circle by slip stitch (sl st) of 3rd chain (ch) into the 1st ch as a join. (Makes a tiny circle)
  • Ch 1 and insert the hook in the tiny hole and make a single crochet stitch (sc).
  • Make 15 more sc in this circle.
  • Sl st the 15th st into 1st ch 1.
  • Total : 16 sc.
Round 2:
  • Ch 6 (Counts as 1 dc and ch 3.).
  • *1 Double crochet (dc) into the next st, ch 3*.
  • Repeat *from around into the next 14 sc.
  • Sl st the 15th st into the 3rd ch of the beginning ch 6 st.
  • Total : 16 dc and 16 ch 3.
Round 3:
  • Sl st to the first ch, ch 3.
  • Dc in the next 2 ch, ch 1, and skip the next dc st.
  • *1 dc in the next 3 ch and ch 1, and skip the next dc*.
  • Repeat * from around with a sl st to the top of ch 3.
  • Total sts: 48 dc and 16 ch.
Free Crochet Shawl Pattern
Shawl in progress.
Round 4:
  • Ch 8 (Counts as 1 dc and ch 5.).
  • Skip the next 2 dc.
  • 1 dc in the ch 1 space (sp).and ch 5.
  • *Skip the next 3 dc, 1 dc in the ch 1 sp, ch 5*.
  • Repeat * from around.
  • Sl st to the 3rd ch.
  • Total: 16 dc and 16 ch 5 sp.
Round 5:
  • Sl st into the ch 5 sp and ch 3. 4 dc in the ch 5 sp. Ch 1 and skip the next dc.
  • *5 dc in the next ch 5 sp. Ch 1 and skip the next dc*.
  • Repeat * from around.
  • Sl st into the top of ch 3.
  • Total: 80 dc and 16 ch 1.
Round 6:
  • Ch 3 and dc in the next 4 dc, skip the next ch 1.
  • *Dc in the next 5 dc and skip the next ch 1*
  • Repeat * from around.
  • Sl st to the top of the ch 3.
  • Total: 80 dcs.
Round 7:
  • Ch 5 (Counts as 1 dc and ch 2).  1 dc in the same sp.
  • Skip the next dc and work v-stitch (v st): [1 dc, ch 2, 1 dc] in the next dc.
  • *Skip next dc, work v st [1 dc, ch 2, 1 dc] in the next dc*.
  • Repeat * from around.
  • Sl st to the top of ch 3.
  • Total: 40 v sts.
Round 8:
  • Sl st into previous row v st space (sp).
  • Ch 5 (Counts as a 1 dc and ch 2) in the v st sp. 1 dc in that same sp.
  • Work v st (1 dc, ch 2, 1 dc) in the next v st sp.
  • Continue *v st (1 dc, ch 2, 1 dc) in the next v st sp*.
  • Repeat * from around.
  • Sl st into the top of ch 3.
  • Total: 40 v sts.
Round 9:
  • Sl st into the next v st sp.
  • Ch 6 (Counts as a 1 dc, ch 3), 1 dc in that same v st sp.
  • Work *v st (1 dc, ch 3, 1 dc) into the next v st sp*.
  • Repeat * from around.
  • Sl st into the top of ch 3.
  • Total: 40 v sts.
Round 10-12
  • Repeat Row 9 for the next 3 rounds.
  • Total: 40 v sts.
Round 13
  • Sl st into the next v st sp.
  • Ch 3 (Counts as 1 dc), 1 dc, ch 3, 2 dc in the same v st sp. Double v st made. (dv st)
  • Work *dv st (2 dc, ch 3, 2 dc) into the next v st sp*.
  • Repeat * from around.
  • Sl st into the top of ch 3.
  • Total: 40 dv sts.
Rounds 14-17
  • Repeat Round 13 for the next 4 rounds.
  • Total: 40 dv sts.
Round 18
  • Ch 2 (Counts as 1 sc, ch 1)
  • Skip the next dc, 5 dc (shell made) in the ch 3 sp of the dv st.
  • Skip the next dc, 1 sc in the next dc, ch 1.
  • Work *skip the next dc, 5 dc (shell) in the dv st sp, skip the next dc, 1 sc in the next dc, ch 1*.
  • Repeat * from around.
  • Sl st into the top of ch 1.
  • Total: 40/5 dc shells (sh), 40 sc.
Round 19:
  • Ch 8 (Counts as 1 dc, ch 5).
  • Skip 2 dc, 1 sc in the next dc (Which is in the middle of the 5 dc sh.), ch 5, 1 dc in the next sc. Ch 5, skip next 2 dc, 1 dc in the next sc.
  • Work *ch 5, skip next 2 dc, 1 sc in the next dc. Ch 5, skip the next 2 dc, 1 dc in the next sc.*
  • Repeat * from around.
  • Sl st into the top of ch 3.
  • Total: 40 sc, 40 dc, 80 ch 5.
Round 20:
  • Ch 4 (Counts as 1 dc and ch 1), ch 1, skip ch 5, dv st (2 dc, ch 2, 2 dc) in the next sc,skip ch 5, v st (1 dc, ch 2, 1 dc) on top of the 1 dc.
  • Work *skip ch 5, dv st (2 dc, ch 2, 2 dc) in the next sc. Skip ch 5, V st (1 dc, ch 1, 1 dc) on top of dc.*
  • Repeat * from around.
  • Sl st into the top of ch 3.
  • Total : 40 v st, 40 dv st.
Round 21:
  • Sl st into the v st sp.
  • Ch 3 (Counts as 1 dc), 1 dc, ch 2, 2 dc in that same v st sp. (dv st made)
  • V st (1 dc, ch 2, 1 dc) in the next dv st sp.
  • Work * dv st (2 dc, ch 2, 2 dc) in the next v st sp. V st (1 dc, ch 2, 1 dc) in the next dv st sp.*
  • Repeat * from around.
  • Sl st into the top of ch 3.
  • Total: 40 v st, 40 dv st.
Free Crochet Shawl Pattern
Do you see the alternating rows of v st and dv st?
Round 22:
  • Repeat Round 20.
Round 23:
  • Repeat Round 21.
Round 24:
  • This time: Turn, and sl st into the v st sp.
  • Ch 3 (Counts as 1 dc.) 3 dc in the same v st sp. Ch 3.
  • Work *4 dc in the next dv st sp, ch 3 and 4 dc, ch 3 in the next v st sp*.
  • Repeat * from around.
  • Sl st into the top of ch 3.
  • Total: 80 /4dc, 80 ch 3.
Round 25:
Starting the Camelot foundation.
  • Turn. Sl st into the ch 3 sp and ch 1 (Counts as 1 sc.). Ch 6.
  • Work * 1 sc in the ch 3 sp, ch 6.*
  • Repeat * from around.
  • Sl st into the top of ch 1.
  • Total: 80 sc, 80/ch 6.
Round 26:
  • Turn.
  • Ch 1 ( Counts as 1 sc.) and sl st into the next ch 3. Ch 3 (Counts as 1 dc.), 3 dc in that same ch 6 sp.  Ch 3, sc in the next ch 6 sp and ch 3.
  • Work * 4 dc in the next ch 6 sp, ch 3, 1 sc in the next ch 6 sp. *
  • Repeat * from around.
  • Sl st into the top of ch 3 as the 4th dc of the last st of this round.
  • Total: 40 sc, 40/4 dc, 80 ch 3.
Round 27:
  • Repeat Round 25 but Do Not Turn!
Now, you can either continue Rounds 25 and 26 or complete Round 28 as the edging. From Round 1 to Round 28, the diameter is at 42”. It depends on the desired diameter as a shawl, blanket, or afghan.

The Edging
Round 28:
  • Turn. Ch 3 and 1 sc in the next 3 dc. 6 dc (shell made) in the next sc.
  • Work *ch 3 and 1 sc in the next 3 dc. 6 dc (shell made) in the next sc.*
  • Repeat * from around.
  • Total: 40 shells, and 40/3 sc.
This shape and the design of the shawl were inspired by a mathematician and by the botanical gardens in Austin, Texas.
After being here for almost a year, I have recovered from many stressful events. This city is wonderful for healing, making new friends, and creating beautiful fabric.
I want to share this pattern with you and ask only one thing in return. I ask that you make one for charity or give as a gift.
Happy Crocheting!